In this comprehensive guide, I’ll take you through a crucial aspect of aquarium maintenance that often baffles both novices and seasoned aquarists alike—the persistent challenge of air bubbles in aquarium silicone. Drawing from years of firsthand experience in the care and construction of aquariums, I have honed a deep understanding of both the genesis and the resolution of air bubbles within silicone seals.
Through this article, you will come to understand not only why air bubbles in aquarium silicone form but also how they can potentially impact the integrity of your aquatic environment. More importantly, I will share with you tried-and-true strategies for preventing their formation during the initial setup, as well as effective methods for removing them should they arise.
Key Takeaways
From my years of experience in crafting and maintaining aquariums, tackling air bubbles in silicone application has been a recurring theme. I want to share some key insights that have helped me along the way:
- Patience is Paramount: Rushing the application process tends to introduce air bubbles. Taking your time to lay a steady bead of silicone ensures fewer opportunities for air bubbles to form.
- Technique Matters: Developing a consistent technique with the caulking gun can significantly reduce the formation of air bubbles. It’s all about how you handle the pressure and the angle at which you apply the silicone.
- Correcting Mistakes Promptly: If you do find air bubbles, addressing them immediately while the silicone is still wet can sometimes save the seal. Use a wet fingertip to gently smooth over the area.
- Practice Makes Perfect: Don’t be discouraged by initial setbacks. Practicing on scrap materials before moving to the actual project can enhance your skill and confidence, reducing the chances of air bubbles.
- Learning From Each Attempt: Every application is a learning opportunity. Reflect on what worked and what didn’t, and adjust your technique accordingly.
Understanding Silicone Sealant in Aquariums
Source: sugartooth
In my years of aquarium maintenance and construction, I’ve come to appreciate the critical role that silicone sealant plays in the success and longevity of aquatic habitats. It’s a fundamental aspect that, quite literally, holds everything together. Therefore, I’m eager to share with you some vital insights into the world of silicone sealants, drawing on my extensive experience.
Role of Silicone in Sealing Aquarium Joints and Gaps
First and foremost, silicone is the unsung hero of aquarium integrity. Its primary role is to create a watertight seal at the joints and gaps between the panels of glass that comprise your aquarium. What makes silicone indispensable is its flexibility, which allows it to accommodate the slight movements of the tank due to water pressure and temperature changes without cracking or breaking its seal. This flexibility is crucial for preventing leaks and ensuring the durability of your aquatic setup.
Types of Silicone Sealants Used in Aquariums
Not all silicone sealants are created equal, especially when it comes to their application in aquariums. It’s vital to differentiate between sealants designed explicitly for aquarium use and those that are not. The former is safe for fish and other aquatic life because it lacks the anti-mold chemicals found in general-purpose silicone sealants. From my experience, always opt for 100% silicone without any added fungicides or antibacterial agents, as these can be harmful to your aquarium’s inhabitants.
Importance of Proper Application Techniques
Applying silicone sealant might seem straightforward, but proper technique is key to ensuring a strong, airtight, and long-lasting seal. Ensuring the surfaces are clean, dry, and free of any old silicone, dust, or algae is crucial before application. I’ve learned that applying a steady, continuous bead and smoothing it with a finger dipped in soapy water can make all the difference in achieving a professional-looking seal that holds up over time.
Preventing and Handling Air Bubbles
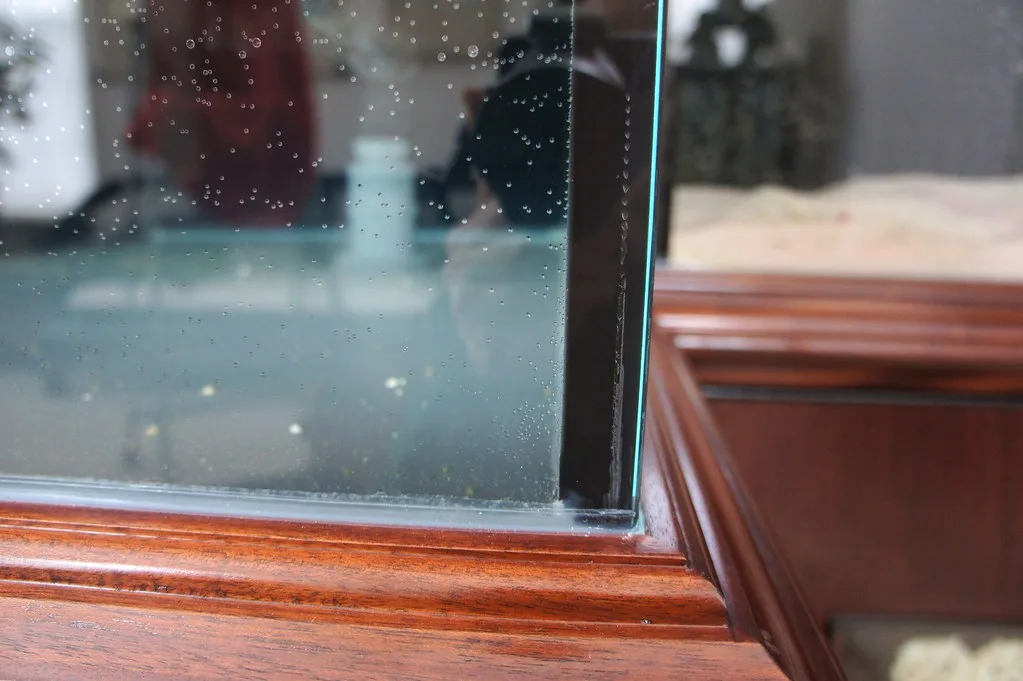
Despite your best efforts, air bubbles can form within the silicone sealant. While small bubbles might not pose a significant threat, larger ones can compromise the seal’s integrity. The trick to preventing them lies in the angle at which you apply the sealant and the speed of your application. If bubbles do form, gently pressing them towards the edge of the sealant before it cures can sometimes eliminate them.
The Cure Time and Full Adhesion
Understanding the curing time of silicone sealant is paramount. The label on the product typically indicates the surface dry time; however, full adhesion and curing can take significantly longer—sometimes up to a week. Patience is key here. Rushing to fill the aquarium before the sealant has fully cured can lead to seal failure and, ultimately, leaks.
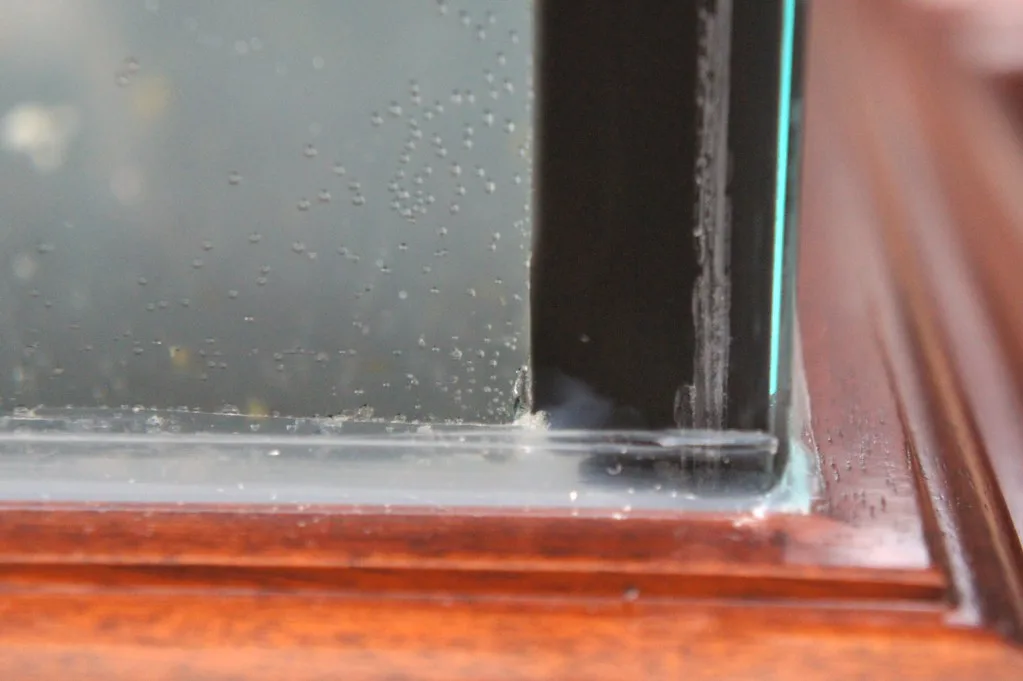
Causes of Air Bubbles in Aquarium Silicone
Source: sugartooth
In my extensive experience with aquarium maintenance and specifically dealing with silicone sealing, I’ve learned that air bubbles in aquarium silicone can stem from a variety of causes. Understanding these causes is the first step towards prevention and solution. Here, I’ll break down the primary reasons air bubbles form, based on what I’ve encountered throughout my years in the field.
Trapped Air During Application Process
One of the most common mistakes leading to air bubble formation occurs during the silicone application process. When sealant is applied too quickly or not evenly, air can become trapped underneath or within the silicone itself. The key to avoiding this is a slow and mindful application, ensuring that the silicone is pressed firmly into the joint, allowing it to fully adhere to the surface without enclosing air pockets.
Inadequate Smoothing or Tooling of Silicone Beads
After laying down a bead of silicone, smoothing (or “tooling”) it out is crucial to ensure not only a neat finish but also the elimination of potential air bubbles. If the silicone is not adequately tooled, air bubbles that formed during the application can get trapped within the sealant. I’ve found that using a fingertip or a silicone finishing tool, lightly dipped in soapy water, allows for smoother tooling and helps to push out any entrapped air.
Environmental Factors Affecting Silicone Cure
Environmental conditions such as temperature and humidity play a significant role in how silicone dries and cures. High humidity or extreme temperatures can either slow down the curing process or cause it to happen too quickly, leading to the formation of air bubbles within the sealant as it dries. Ensuring a stable, moderate environment when applying and curing silicone can mitigate these risks significantly.
Improper Surface Preparation
Before even opening the tube of silicone, the preparation of surfaces is paramount. Any presence of dust, old silicone, or moisture can prevent the silicone from adhering properly, creating air gaps that result in bubbles. I always emphasize the importance of thoroughly cleaning and drying the area to be sealed to avoid such issues.
Use of Expired Silicone Sealant
Finally, an often-overlooked cause of air bubbles is the use of silicone sealant that has passed its expiration date. Expired silicone may not adhere properly, and its consistency can lead to increased air entrapment during application. Always check the expiration date on your silicone sealant to ensure it’s still good to use for your aquarium project.
Potential Risks Associated with Air Bubbles in Silicone
Source: sugartooth
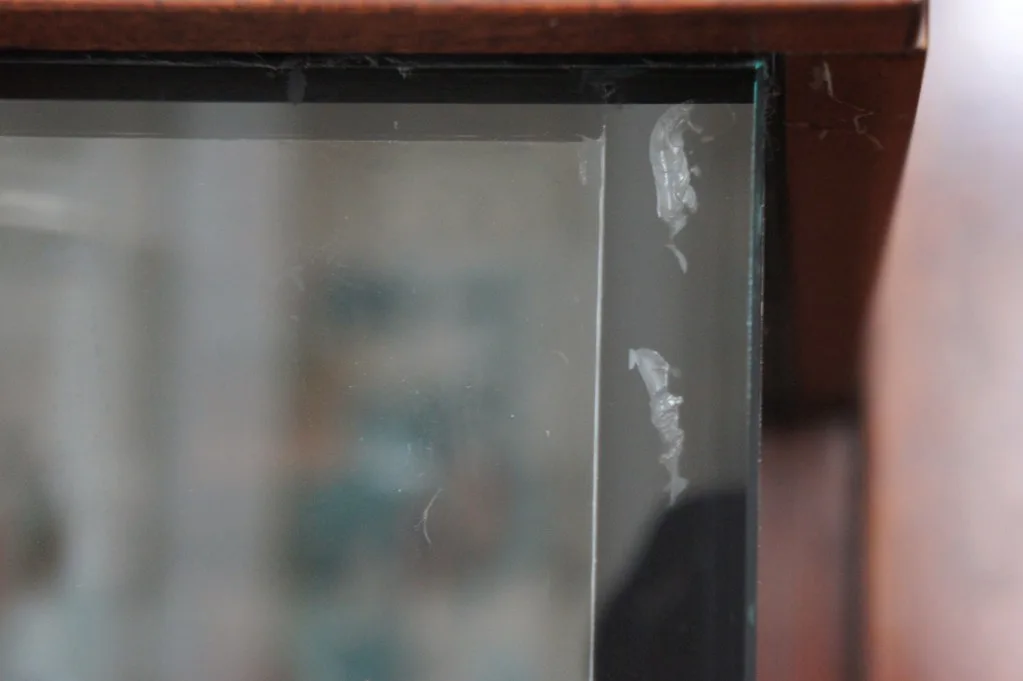
In my years of experience with aquarium setup and maintenance, I’ve come to learn that the presence of air bubbles in silicone sealant is not just a minor inconvenience; it poses several significant risks to an aquarium’s integrity and appearance. Here, I’ll elaborate on the issues I’ve witnessed firsthand and explain why meticulous attention during the sealing process is pivotal.
Compromised Structural Integrity of Seals
One of the primary concerns with air bubbles in the silicone sealant is the compromised structural integrity of the seals. These bubbles can weaken the silicone’s adherence to the glass panels of the aquarium, which in turn can lead to a reduced ability to withstand the constant pressure exerted by the water inside. I’ve seen instances where this weakened bond has led to the gradual (or sometimes sudden) failure of the seal, endangering the aquatic life within and potentially causing significant water damage to surrounding areas.
Water Leakage and Tank Integrity Concerns
Closely linked to compromised structural integrity is the risk of water leakage and subsequent impacts on tank integrity. Even small leaks can escalate quickly, leading to a complete breach of the aquarium seal. Through my hands-on work, I’ve observed how even minor water leakage can not only harm the inhabitants of the tank but also compromise the tank’s foundation, necessitating costly repairs or even a complete tank replacement.
Impact on Aesthetics and Visual Appeal
Beyond the structural and functional implications, air bubbles in silicone can significantly detract from an aquarium’s aesthetic appeal. Aquariums are often focal points in a room’s decor, and the clarity of the silicone seams plays a big role in the overall visual appeal. From my perspective, bubbling and uneven seals can be unsightly, drawing attention away from the beauty of the aquatic environment it’s meant to host.
Risk of Contaminant Entrapment
Another issue I’ve come across is the risk of contaminant entrapment within air bubbles. These bubbles can trap dust, algae spores, and other microscopic debris during the curing process, creating potential sites for algae growth or accumulation of harmful substances. This not only affects the aquarium’s appearance but can also lead to water quality issues that are harmful to its inhabitants.
Increased Difficulty in Remedial Work
Finally, addressing air bubbles after the silicone has cured increases the difficulty of remedial work. Based on my experience, it’s far easier and more effective to prevent or address issues during application than to attempt to fix them after the silicone has set. Remedial efforts often require cutting out and replacing sections of the sealant, a process that risks further damage and can be incredibly time-consuming and frustrating.
Prevention and Remediation of Air Bubbles in Aquarium Silicone
Source: sugartooth
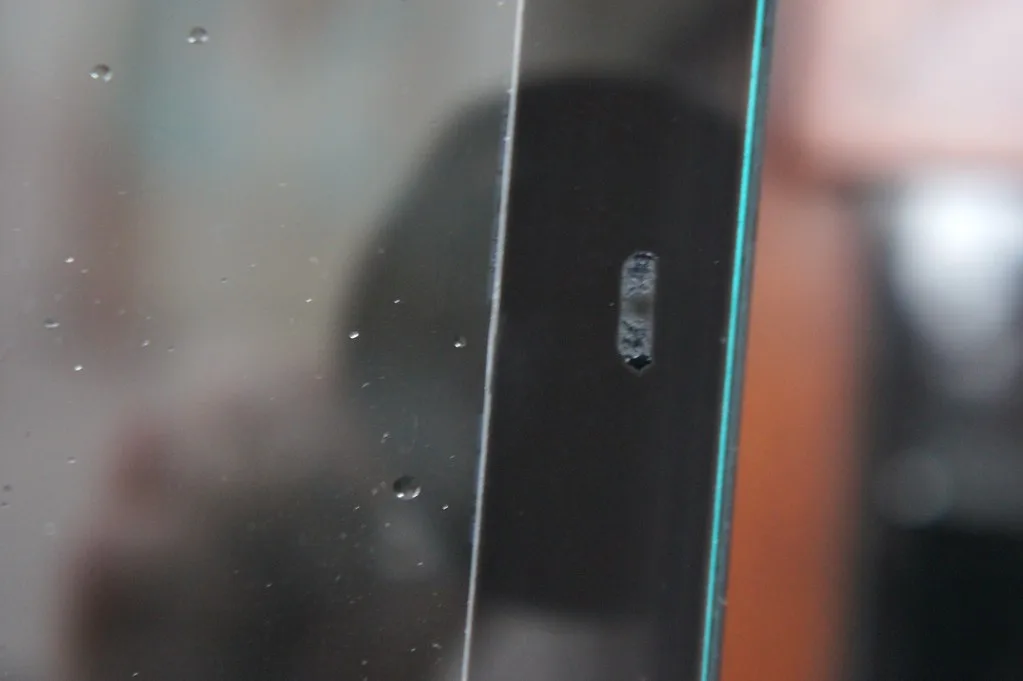
In my extensive experience with aquariums, I’ve discovered that prevention is key when it comes to air bubbles in silicone sealant, but understanding how to effectively address them if they do arise is equally important. Here, I’ll share insights and strategies that have served me well over the years.
Proper Preparation of Surfaces Before Silicone Application
The adage “preparation is half the battle” rings especially true in the context of applying silicone. Before I even begin, ensuring that surfaces are immaculately clean and completely dry is essential. My routine involves carefully removing any residues, dust, or old sealant and then wiping down the surfaces with a clean, lint-free cloth and an appropriate cleaner. This step significantly reduces the likelihood of air bubble formation.
Techniques for Minimizing Air Entrapment During Application
Through trial and error, I’ve honed a few techniques to minimize air entrapment. First, cutting the silicone tube’s tip at a 45-degree angle allows for smoother application in a continuous motion, which helps prevent air from being trapped as the silicone is laid down. Also, applying in thin, steady lines rather than in blobs has been crucial for me. After application, dragging a silicone spatula or even a moistened finger across the bead in one smooth motion can eliminate any bubbles that may have formed.
Remedial Actions for Addressing Existing Air Bubbles
Once silicone has cured, dealing with air bubbles can be challenging, but not impossible. For small bubbles near the surface, gently slicing them open with a razor blade and then applying a tiny amount of fresh silicone into the slit can work wonders. It’s a delicate process that requires a steady hand and patience, but it’s saved many of my projects from needing a full redo.
Maintaining Optimal Environmental Conditions
I’ve learned the hard way that environmental conditions can drastically impact the application and curing process. Maintaining a stable temperature and moderate humidity in the workspace can prevent a lot of issues with air bubbles. An environment that’s too humid or too cool can extend curing times or cause the silicone to cure unevenly, increasing the risk of bubbles. Using a dehumidifier or air conditioner to control these conditions has become a standard practice for me.
Regular Inspection During Curing
Frequent inspection of the silicone during its curing time allows for the early detection of potential air bubbles. In my routine, I check the sealant at intervals, particularly in the first few hours after application. This proactive approach gives me a window to smooth out any imperfections before the silicone sets completely.
Testing and Quality Assurance Measures
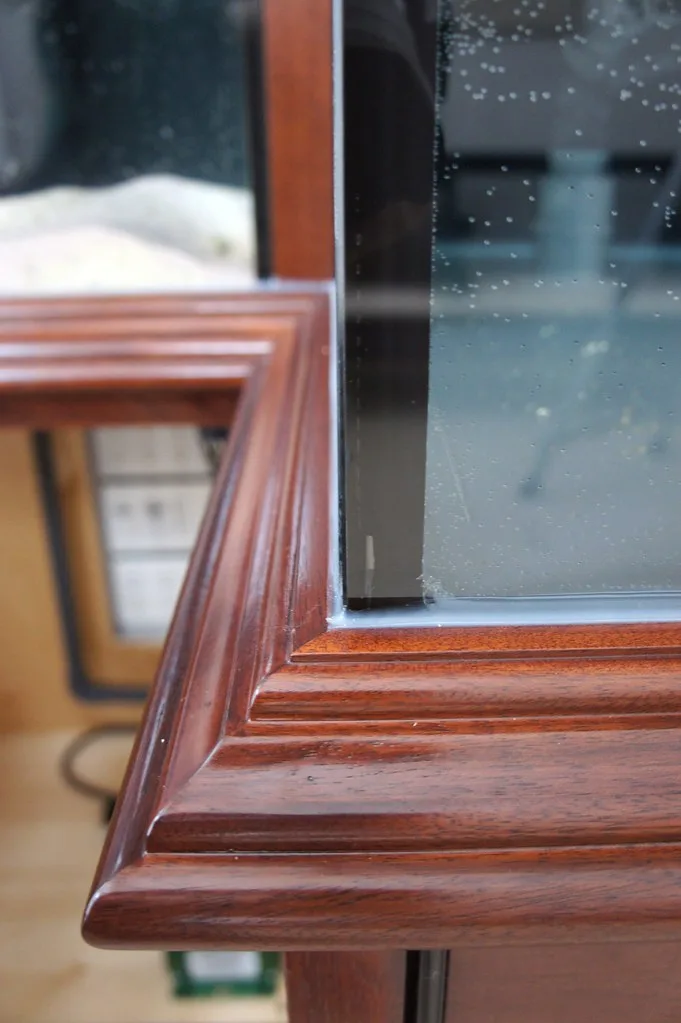
Source: sugartooth
Ensuring the integrity of an aquarium setup is not just about applying silicone meticulously; it’s about knowing with certainty that your work will hold up under pressure – literally. The final step, which is as critical as the preparation and application, involves comprehensive testing and quality assurance measures. Drawing from my years of experience, I’ll walk you through the procedures I rely on to guarantee the safety and durability of my aquariums.
Importance of Thorough Inspection Before Filling the Aquarium
Before introducing even a drop of water, I conduct a meticulous visual inspection of all silicone seams. This isn’t merely a cursory glance; it involves looking at every inch of the sealant under good lighting to check for any irregularities, gaps, or potential weak spots. This step can’t be overstated; identifying issues now, when the tank is dry and accessible, can save countless hours and prevent potential disasters down the line.
Performing Leak Tests and Visual Examinations
After the visual inspection, the next step in my process is the leak test. I fill the aquarium with enough water to pressurize the seams but not so much that a potential failure could result in massive water damage. This water is left in for at least 24 to 48 hours while I periodically check for any signs of leaking. It’s not just about looking at the base of the aquarium; I also examine the silicone seams from the inside to see if any bubbles or unusual moisture accumulation is present.
Seeking Professional Assistance for Complex Issues
Despite our best efforts, some issues may be beyond the scope of a DIY fix, especially when dealing with large aquariums or complex configurations. In these cases, I don’t hesitate to seek professional assistance. Consulting with a reputable aquarium maintenance expert or a silicone application specialist can provide solutions that are not immediately apparent and can ensure that your aquarium is as secure as possible.
Utilizing Diagnostic Tools for Precision
Throughout the years, I’ve incorporated the use of diagnostic tools into my quality assurance routine. Tools like moisture meters, which can detect unusually high levels of humidity within the structure of the aquarium, or ultrasonic thickness gauges, useful for detecting variations in silicone thickness, have proven invaluable. These tools offer a level of precision that goes beyond the naked eye, providing peace of mind that the aquarium is truly ready for its aquatic inhabitants.
Documentation of the Process
One practice that has significantly benefitted my projects is the thorough documentation of each step of the process, including any testing and quality assurance measures taken. Keeping a log of what was done, the environmental conditions, and the results of each test not only provides a valuable reference for future projects but also helps in diagnosing issues if they arise later on. This proactive approach ensures a high standard of quality and reliability in all my aquarium setups.
Tips and Best Practices for Silicone Application
When it comes to creating a watertight seal for your aquarium, choosing the right type of silicone sealant is the first step toward ensuring a successful project. Throughout my years of experience, I’ve learned that not all silicone sealants are created equal, and the secret to achieving a perfect seal lies in selecting a product specifically designed for aquarium use. This means opting for a 100% silicone product without any added mold inhibitors or antibacterial properties, which can be harmful to aquatic life.
Choosing the Right Type and Brand of Silicone Sealant
My go-to rule is to always choose a silicone sealant that is labeled as ‘aquarium-safe’ or has a specification that it does not contain acetic acid. Over time, I’ve found that certain brands consistently outperform others in terms of durability and flexibility, which are critical for maintaining a leak-proof seal in an environment that’s constantly under water pressure. I recommend doing your research and reading reviews from other aquarium enthusiasts to find the brands that are most trusted within the community.
Utilizing Appropriate Tools and Techniques for Application
Applying silicone sealant might seem straightforward, but using the right tools and techniques can make a significant difference in the outcome. For me, a caulking gun is a must-have tool because it allows for controlled application, enabling you to lay down a consistent bead of silicone. It’s also important to cut the nozzle at a 45-degree angle, matching the size of the gap you are filling. I’ve found that using masking tape to create straight edges on either side of the seam before application not only helps in achieving a professional look but also in controlling the spread of the silicone.
Maintaining Clean and Dry Work Surfaces
Before any silicone touches your aquarium, ensuring the surface is clean and completely dry is paramount. Any moisture or residue on the glass can prevent the silicone from adhering properly, leading to potential leaks. I always clean the surfaces with isopropyl alcohol and allow them to dry thoroughly before application. This extra step has been crucial in preparing the surface and guaranteeing a bond that lasts.
Taking Your Time
One of the biggest lessons I’ve learned is the importance of not rushing the process. From prep work to application and curing, giving yourself enough time to do each step properly can save you from headaches later on. A hurried job often leads to missed spots, uneven lines, or air bubbles, which compromise the integrity of the seal.
Practice Makes Perfect
Lastly, if you’re new to applying silicone sealant, I can’t stress enough the value of practice. Try running beads on scrap pieces of glass to get a feel for how the silicone comes out of the tube and how much pressure to use on the caulking gun. Experimenting with angle and speed can give you the confidence needed for the actual application on your aquarium.
Common FAQs and Troubleshooting
Throughout my experiences, I’ve encountered a variety of questions and challenges when working with silicone in aquarium setups. Here, I’ll share some insights and tips based on common issues I’ve faced, including how to tackle them effectively.
How to Remove Air Bubbles After Silicone Application
Air bubbles can be a nuisance and potentially compromise the integrity of your aquarium’s seal. If you spot bubbles shortly after application, gently pressing on the silicone with a wet finger can sometimes merge them into the surrounding material, effectively removing them. For bubbles that have already cured, carefully removing a small section around the bubble and reapplying silicone might be necessary. From my experience, ensuring a continuous, steady pressure when laying the bead of silicone helps in preventing the formation of bubbles.
Dealing with Silicone Failure and Re-Sealing Techniques
Facing silicone failure is never pleasant but not insurmountable. The key is thorough preparation. Remove all the old silicone, being sure to get rid of any residue. A razor blade can be very effective for this task, but always be careful not to scratch the glass. Once the area is clean and dry, apply a new layer of silicone, following the best practices previously discussed. I’ve learned that sometimes a failure is an opportunity to reinforce and ensure even greater durability in your aquarium’s structure.
Addressing Concerns About Silicone Safety in Aquariums
Safety for your aquatic life is paramount, which is why selecting the right type of silicone is critical. Any silicone used should be 100% silicone without any fungicides or chemicals designed for mold resistance, as these can be toxic to fish and other tank inhabitants. If you’re unsure, check the product specifications or contact the manufacturer. Based on my experience, most brands selling ‘aquarium-safe’ silicone are suitable, but it never hurts to double-check.
Preventing Overflows During Application
One challenge often overlooked is the risk of silicone overflow, which occurs when too much sealant is applied, leading to excess squeezing out from the seams. To prevent this, I always use masking tape to mark the exact areas where I want my silicone to be applied, leaving a clean, professional finish and controlling the spread of the sealant. This method also makes clean-up easier and ensures that your application remains precise and contained.
Curing Time and Water Exposure
A frequent question is about the curing time of silicone and when it’s safe to fill the aquarium with water. The curing time can vary depending on the brand of silicone, humidity, and temperature. I typically recommend waiting at least 48 hours before beginning to fill your aquarium, but it’s always best to consult the specific instructions on your silicone sealant. Some products may require longer to achieve full strength and ensure a completely watertight seal.
My Opinion on Air Bubbles in Aquarium Silicone
In my years of working with aquariums, air bubbles in silicone have been a common hurdle. From my experience, while they seem like a small issue, they can potentially lead to significant problems if not addressed properly. I believe that the key to avoiding air bubbles lies in the technique and patience during application.
A steady hand and a calm, unhurried approach have been my best tools against this issue. Remember, it’s easier to take a moment to do it right than to spend hours, or even days, fixing a problem later. My advice to fellow enthusiasts is to not be discouraged by these challenges. With practice and attention to detail, achieving a bubble-free seal is certainly within reach. Engage with your projects, learn from each attempt, and continue to share your experiences.
Together, we can turn these challenges into valuable learning opportunities, enhancing our skills and the well-being of our aquatic friends.


Your blog is a beacon of light in the often murky waters of online content. Your thoughtful analysis and insightful commentary never fail to leave a lasting impression. Keep up the amazing work!